Showing posts with label Basic Techniques. Show all posts

Thursday, February 1, 2018

Frosting a Cake

Slice of frosted chocolate cake

“There's nothing better than cake but more cake.” Harry Truman

What is your favorite comfort food - the dish that makes your shoulders relax and your mouth water? For me, it's home-baked chocolate cake tucked under a supple layer of fudgy frosting. I've made many versions (including a double-decker, ganache-filled extravaganza topped with flowers sculpted from modeling chocolate for my sister's 40th birthday). When I show up for celebratory gatherings, family and friends assume I'll be toting cake.

The most important thing I’ve learned over the years is that no one expects perfection. In fact, they rarely seem to notice (or care) if a cake tilts or frosting gets smudged. The intoxicating flavor of homemade icing and cake makes them feel loved. Use the tips below to spread that warm fuzzy feeling. 


Basic Tools for Frosting Cakes

  • A serrated knife: Many cakes develop a domed top when baked, which should be removed before they are frosted. A serrated knife, such as a bread knife, is the best tool for the job as it easily slices through cake crumbs. 
  • Offset spatula: Although I try my best to get by with basic kitchen equipment, I believe a small offset is an essential tool for the avid baker. Use it to spread icing, custard, and other fillings on cakes and pastries.
  • Parchment paper or wax paper: You can use either of these products to keep trimmed cakes from spreading crumbs.
How to Frost a Cake


Make sure that the cake has cooled completely or your frosting will melt. 

Place the first layer of cake on a sheet of parchment paper or wax paper. Hold the knife horizontally against the cake where it starts to dome and carefully slice across the top to create a flat surface. Repeat with the other layers.


Slice dome off of layer of cake
Place the first layer of cake on a plate or cake stand with the bottom facing up. This helps to ensure that the top is completely flat.

Place cake on a cake stand or plate bottom side up
Tuck strips of parchment paper or wax paper between the cake and the plate to catch crumbs and bits of frosting.

Tuck parchment paper underneath cake
Gently remove any loose crumbs with your fingers or a pastry brush.

Remove loose crumbs with your fingers or a pastry brush
Place a dollop of frosting on the center of the cake.

Using the offset spatula spread the frosting to cover the top of the cake.

Spread frosting evenly across the top of the cake
Place the second layer of cake on the first layer with the bottom facing up. Again, dust away any loose crumbs. 


Now it’s time to add the “crumb coat” which locks in any wayward crumbs. Place a scoop of frosting on the top layer of the cake.

Spread frosting across the top of the cake
Using the offset spatula, spread the frosting from the center of the cake to the top edges.

Spread icing on sides of cake
Chill the cake for 30 minutes in the refrigerator (or for 15 minutes in the freezer).


Remove the cake from the refrigerator. Place a generous scoop of frosting on top of the cake. Using the offset spatula spread the frosting across the top of the cake starting in the center.

Add layer of frosting over crumb coat


Spread the frosting on the sides of the cake to cover completely.


Spread frosting over crumb coat
Remove the strip of parchment paper or wax paper.  

This article was originally published on WholeFoodsMarketCooking.com 
Advance purchase required!
Book your Chicago Food Tour today!
buy tickets at zerve
or call Zerve at (800) 979-3370

Friday, January 12, 2018

Cooking Pot Roast

Plate of roast and green beans
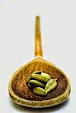
People think of the Midwest as a monolith of meat and potatoes, and there was ample evidence of that when I was growing up in rural Illinois. Plenty of kids I knew sat down to a cadence of meatloaf, Sloppy Joe's, Salisbury steak. Repeat. My mom served at least one meat dish a night because my Dad couldn't bear a meal without Spicy Fried Beef, Chicken Stew, or some other carnivorous option. Every once in a while, she would rotate in a pot roast flavored with the holy trinity: cardamom, cloves, and cinnamon. To this day, it is my favorite beef dish.

When I started cooking for myself, I learned that braising beef includes a simple two-part process. The first involves searing meat to produce a full-flavored, outer crust. Then the meat is slow cooked in the oven or on the stove until it (or other tough cuts of meat) become ooh-la-la tender. All that's needed to pull it off is a heavy pot with a snugly fitted lid and a large pair of tongs.


How to Braise Beef

With a paper towel, pat the meat dry on all sides.
Season it with salt and pepper or your favorite spice rub.

Season beef with salt and pepper

Coat the bottom of a heavy pot with a thin layer of oil and place it over medium-high heat.

Using tongs, lower the meat into the pot.


Use tongs to lower meat into pot
Sear the bottom side. Rotate the meat and repeat until all sides are browned.


Sear meat

Remove meat from the pot and place it on a plate.

Let meat rest

Add aromatics and spices to the pot. Here, I’m using onions, garlic, cardamom, cloves, and cinnamon.  Cook until the onions start to soften.


Add aromatics
Add a liquid (such as water, wine, stock, or a combination) and stir to scrap off any bits of meat or onion sticking to the bottom of the pot.


Place the meat back into the pot.


Place meat back into pot
Cover it with a tight-fitting lid. Continue to cook on the stove top or place in a low oven (about 300 degrees) until the meat becomes tender. Store leftover braised beef in its braising liquid to prevent the meat from drying out.

This article was originally published on WholeFoodsMarketCooking.com 
Advance purchase required!
Book your Chicago Food Tour today!
buy tickets at zerve
or call Zerve at (800) 979-3370

Thursday, July 20, 2017

Caramelizing Onions

Before I met my husband, Chris, I tried my luck with online dating, which ran the gamut from dismaying to disastrous. Sound familiar anyone?

There was the guy who besmirched all Indians even though he knew my ethnic roots. During our shared meal, the waitress kept giving me “you outta ditch him” looks. Then there was the guy who unwittingly emailed me after dating my sister for several months. Guess he had a type.

There was also the guy with the seemingly promising profile (challenging job, close-knit family, big blue eyes) until I reached his list of likes/dislikes. He despised onions and didn't want them cooked in his house.

I know that relationships require compromise, but I eat onions every day. Could I really forgo the zing of red onions in salsa or three bean salad? Wouldn’t I miss the smoky undertow of yellow onions roasted with potatoes, carrots, or squash? And what about the silky, sweet touch of caramelized onions slathered on burgers, sandwiches, and pizza crust?

In the end, I decided giving up onions was too great a sacrifice and I kept looking for the one.

Did I mention that Chris loves onions? In fact, I have to ask him to dial back the mound he that mixes into guacamole and the hill that he layers onto salad. It leads to onion breath and occasional indigestion.

But that seems like a small sacrifice for Mr. Right. 

How to Caramelize Onions

Caramelizing onions is surprisingly simple. It involves cooking away the moisture hidden in each layer of an onion and browning the sugar that is left behind. The process requires patience more than anything else. Resist the temptation to speed things up by cooking the onions over high heat or adding sugar. (Chances are you’ll end up burning them.) Also opt for white, yellow, or red onions but not sweet as they become cloying when their flavors are concentrated.


To make about 1 to 1 1/2 cups of caramelized onions, thinly slice 2 large onions.


Thinly sliced onions


In a large skillet, heat 1 1/2 tablespoons of olive oil over medium heat.


Heat olive oil


Add the onions and stir to coat them with oil. Season the onions with salt and pepper. Stir the onions every 2 to 3 minutes until they begin to look glassy.

Lower the heat to medium low and increase the frequency of stirring from every few minutes to every minute as they become stickier, turn light brown, and begin to lose their shape. This will take 20 to 30 minutes, depending on your stove top. 


Stages of caramelization
If the onions stick to the bottom of the pan, add a splash of water and scrap them off. This technique is known as "deglazing." Only do this if the onions are sticking so much that you can't loosen them without water -- some sticking is good as it's the contact with the pan that helps to create the color. You can always add more water if necessary, but adding too much will delay the process as the onions will begin to steam.

Continue to cook the onions, stirring frequently, until they become golden brown.


Advance purchase required!
Book your Chicago Food Tour today!
buy tickets at zerve
or call Zerve at (800) 979-3370

Wednesday, July 12, 2017

Poaching Fish

Poached salmon over sauteed greens

Dear readers, raise your hand if you eat two servings of omega-3 rich fish a week. Well, don’t feel bad – neither do I. But I’m starting to think that we should change our ways. After all, fatty fish is not only lovely and nuanced, it’s also easy to cook.

I usually bake or braise fish, which requires minimal effort. But with the summer heat, I’ve been poaching salmon and other fatty fish to eat it warm or chilled over a bed of sprightly greens. Like other moist-heat cooking methods, poaching locks in moisture and practically gives cooked salmon the texture of butter. I know it sounds crazy, but I am not making this up. The truth is you can easily make a five-star meal in your own kitchen, however humble it may be. Looking to comfort yourself after a long day of work or to toast the summer sunset with friends? Then, why not poach some fish.

How to Poach Fish

Chopped celery, carrots, parsley, and peppercornsFill a sauté pan or shallow pot with enough water to cover the fish.

Add a handful of your favorite herbs and spices to flavor the water. I threw in carrots, celery, cilantro, and peppercorns for this version. I also like to create a broth of sorts with lemongrass, garlic, and onions. Get creative here as the possibilities are endless (and surely you know how variety spices up life).

Adding vegetables, herb and spice to simmering water


Heat the water to a gentle simmer so tiny bubbles form along the rim of the pot. Let it simmer for 5 minutes to flavor the water.

Simmer vegetables, herb, and spice


Lower the fish into the water using a slotted spoon.

Lower fish into water


Cook the fish until it turns opaque and is heated through -- this will take about 3 to 5 minutes, depending on the density of the fish.


Carefully remove the fish with the slotted spoon, and serve warm or chilled. 

Remove fish from water with slotted spoon


Advance purchase required!
Book your Chicago Food Tour today!
buy tickets at zerve
or call Zerve at (800) 979-3370

Wednesday, April 19, 2017

Cooking Dry Beans

Black Bean Tacos

I prepared a lot of bean dishes in graduate school. Chickpeas were my go to legume. When I was really strapped for time, I would sauté them with turmeric and cumin and smother them in salsa. I loved the contrast of the creamy garbanzo beans and the feisty tomatoes. The cost of preparing the dish was low, and as a grad student that was a huge bonus. 

These days when I cook beans, I reach for dried beans whenever possible. Dried beans are not only cheaper than canned beans, they are free of salt and other unwanted preservatives. When cooked properly, dried beans are also mush-free unlike so many of their tinned cousins.
Soaking Methods for Dried Beans
Using dried beans admittedly requires a bit of planning. After being picked over and rinsed, the beans should be hydrated to reduce their cooking time. This is done using either a quick soak method or a long soak method.
  • The quick soak method (also known as a hot soak) involves boiling dried beans for two minutes and then soaking them for an hour or so in the hot liquid before cooking them.
  • The long soak method, or cold soak, requires soaking the beans in cool water for six to eight hours before cooking them. 
Dried, soaked, and cooked black beans

Black beans in three stages (l-r): dried, soaked, and cooked
Regardless of which method you use, always start with the freshest beans possible (versus those that have languished on the pantry shelf). Not surprisingly, the fresher the bean, the better its cooked texture will be.
How to Cook Dried Beans
Lay the dried beans on a countertop or cutting board. Pick out and discard any shriveled beans, small stones, or other foreign matter. 
Picking through dried beans


Rinse the beans with cold water and drain. 

Soaked beans
To soak with the quick soak method: Place the beans in a pot and cover them with water, using three cups of water for every cup of beans. Bring to a boil and cook for two minutes. Remove from heat. Cover and set aside for an hour.

To soak with the long soak method: Place the beans in a pot and cover with water, again using three cups of water for every cup of beans. Cover and set aside for six to eight hours.

Drain and rinse the soaked beans.  


Place the beans in a pot and cover with water (using three cups of water for every cup of beans). Bring the water to a boil. Reduce the heat to produce a gentle simmer. When the beans just start to soften, season with salt. 
Cook the beans until they are tender, adding water when needed. Cooking times will vary depending on the type of bean you are using. Pinto and garbanzo beans take longer to cook than kidney, navy, and lima beans. Drain beans in a sieve.

Cooked and drained black beans


Advance purchase required!
Book your Chicago Food Tour today!
buy tickets at zerve
or call Zerve at (800) 979-3370

Saturday, April 1, 2017

Boiling Eggs


When I was four, our family traveled to Ontario to visit the Raos, who were close family friends. Just before dusk the first night, I managed to get lost in their subdivision. A neighbor heard me whimpering to her cat who was lounging in the driveway. I had thick black hair and a bangle encircling each wrist. She guessed that I was related to the Raos who were the only Indians on the block. To confirm her suspicion, she asked me what I liked to eat. Instead of  saying "curry," I responded with "Cookies and eggs." Thankfully, she called the Raos anyway.

I still get weak in the knees when I eat eggs, and am especially fond of  Eggs in Coconut Milk and Egg Roast. On the rare occasion when my fridge is near empty, I boil one up until its yolk is velvety and its white has a cushy softness. I sprinkle it with salt and pepper for breakfast in a flash.

It’s easy to overcook eggs. To avoid producing boiled eggs with rubbery whites and yellow-green yolks, follow these simple steps:

How to Boil Eggs 

Fresh eggs are often harder to peel than eggs that have been around for a week or so. So boil older eggs whenever possible. 

Place eggs in a saucepan in a single layer. Cover with an inch or so of cold water. Bring the water to a boil over high heat.

Eggs in water


Remove the saucepan from the heat. Cover with a lid and let the eggs sit in the water for five minutes to make soft boiled eggs and 15 minutes for hard boiled eggs. 

How to Peel Boiled Eggs

Drain the water. Allow the eggs to cool for one minute until they are easy to hold. 

For soft boiled eggs: Carefully tap the top of the egg on a hard surface to crack the shell. Peel off the top third of the shell. Use a spoon to scoop out the cooked egg.

For hard boiled eggs: Crack the egg shells by gently rolling each egg against a hard surface with the palm of your hand. You can also cover the saucepan with a lid and slide it across your kitchen counter to crack the shells of the eggs inside. Hold each egg under cold water and peel off the shell, beginning at the wide end, which gives most easily.
 

Advance purchase required!
Book your Chicago Food Tour today!
buy tickets at zerve
or call Zerve at (800) 979-3370

Saturday, December 17, 2016

Making Ganache

Double chocolate pie
My Dad and I manage all of the grocery shopping during the holidays. It's a big relief for my mom who prefers to minimize all kitchen-related activities. The fact that Dad and I are bewitched by food, however, can pose a problem. Put us in a supermarket and we lose all sense of time.

Dad begins his meditation in the cheese aisle, where he carefully assesses the smoked gouda. After selecting only the best, he  reverently moves on to evaluate what's available in the realm of mixed nuts and wine. Should it be Merlot or Cabernet? Spain, Argentina, or California?

I head to my culinary playground - the baking aisle - where I ogle at local honey and sparkly sprinkles. I ponder all of the decadent desserts I can create with chocolate: airy mousse, toothsome brownies, lush ganache. Meanwhile, Mom is tapping her foot at home and wondering if we'll ever show up. Remember, her goal is to get in and out of the kitchen, lickety-split!


How to Make Ganache

Used to sculpt truffles, fill cakes, and blanket tarts, ganache is the home cook’s oh-so-easy-to-make secret weapon. It requires two ingredients: heavy cream and chocolate. Since the chocolate goes unmasked, be sure to buy the finest quality you can afford.

To make ganache that’s on the thinner side (and perfect to pour over tortes or spread over cakes in lieu of icing) start with an equal ratio of chocolate to heavy cream. To make ganache with a fudge-like consistency, use twice as much chocolate as heavy cream.


Finely chop the chocolate with a chef’s knife.  


Finely chopped chocolate
Place the chocolate in a heatproof bowl. 


Place chocolate in a heat-proof bowl
Pour the cream into a saucepan. Bring it to a boil, and then quickly remove it from the heat to help stop the water in the cream from evaporating

Pour cream in a pot and bring to a boil
Carefully pour the hot cream over the chopped chocolate. Let it stand for a minute. The chocolate will start to melt. 


Pour cream over chopped chocolate
Stir the chocolate and cream, beginning in the middle of the bowl. After several minutes, it will start to emulsify and silky, smooth ganache will appear in the middle of the bowl. 


Stir beginning in the middle of the bowl
Continue to stir
Stir in wider circles to blend the rest of the chocolate and the cream.


Continue to stir
Continue stirring until the chocolate and cream are completely combined.


Mix until completely blended
This article was originally published on WholeFoodsMarketCooking.com


Advance purchase required!
Book your Chicago Food Tour today!
buy tickets at zerve
or call Zerve at (800) 979-3370